
I am going to explain how to use Eclipse with Glassfish as a server. This tutorial uses a very simple, picture based approach. So trust me and take my advises you will make it to the end for sure.
1- Create a dynamic web project:
Open eclipse, file, new, [web], dynamic web project
1- Create a dynamic web project:
Open eclipse, file, new, [web], dynamic web project

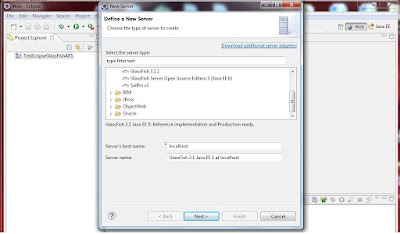
2- Create a new server
Go to bottom right frame, select servers, right click in the frame content area, server, new

3- If GlassFish connection has been made for your Eclipse installation previously you will get this picture. But in your case, GlassFish will not appear.
4- Click ‘Download additional web servers’. It will open ‘ install new extension’ window and begin searching the internet. This will take a long time.
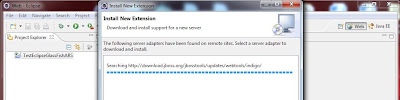
5- Be patient and wait till the end when finally it finds GlassFish and Jboss.

4- Click ‘Download additional web servers’. It will open ‘ install new extension’ window and begin searching the internet. This will take a long time.

5- Be patient and wait till the end when finally it finds GlassFish and Jboss.

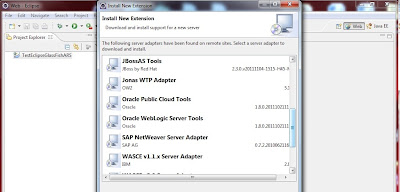
6- Select GlassFish and see that the previous window has the GlassFish items now.

7- Select GlassFish 3.1 and a new screen taht asks for the location of Glassfish on your computer opens. It also calls for your choice of jre.

8- Then you are asked for the admin directory and the admin password which happens to be adminadmin

9- Now it is time to try the very simple dynamic web program that we have created.
 Do not forget to put index.jsp as a welcome file in the web.xml.
Index.jsp is on the picture.
10. Run the webapp on the new server.

11- Select Glassfish

12- ERROR: Glassfish requires JDK 1.6 and not a JRE.

You can request a better printed World version of this tutorial from arsaral(at)yahoo.com
The pictures are much better and scripts can be easily read in that version.